Do you want to learn how to build a fire pit with pavers? With paver fire pits, you can create a backyard focal point that is long lasting and customizable. In this article, we’ll showcase the easiest way to build a fire pit with pavers in your backyard.
Type of blocks used in Fire Pits
While fire pits made out of different landscape blocks may look like they are very durable, weather resistant and last a long time; in reality the type of blocks used for these can be used in many other ways. They could be used to create retaining walls or raised bed gardens, among others.
Rectangle and trapezoid fire pit blocks offer a unique installation option. With the shape of these bricks, you can install your kit in an appealing circular or wavy pattern that enhances its aesthetic appeal.
If you don’t want to figure out how many blocks you need for the design you want, a fire pit kit is great. It includes everything that was in my kit: The block itself along with an insert ring and pressure-sensitive adhesive so it can be built easily without any additional tools or materials needed other than construction glue.
Prepping your Site

Once you have your fire pit kit picked out, it’s time to prep the site. You need a level area for installation so if your yard is very unleveled or has many dips and bumps in its surface, purchase leveling sand before moving on with the project.
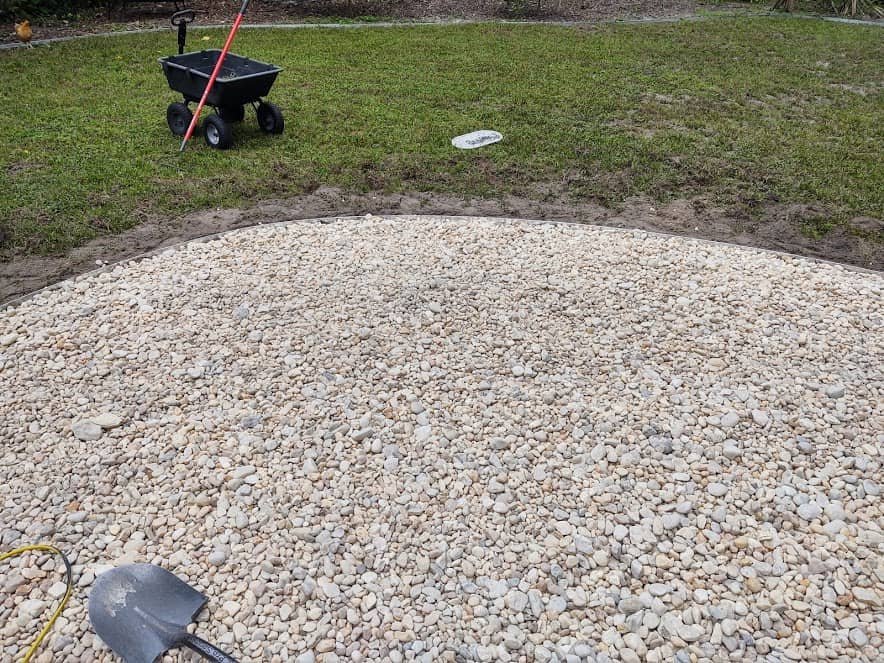
I had already leveled the sand in preparation for my river rock since this would provide a base. I was confident I could level out the ground without using paver base sands which are more expensive but also unnecessary depending on your needs and expectations of end result.
The defined area for the fire pit is a half circle. I wanted it in the middle of that, so I took some measurements to find out where this would be best situated.
Rather than starting with my measurements for the outer circle, I decided to start by removing river rock around my fire pit. It was easier and more efficient when it came time to lay down paver blocks because they would fit perfectly in that space instead of resting on top of rocks which could make them shift slightly over time.
Once I removed all the rocks from the outside perimeter, I removed the insert and then removed all the rocks from the inside circle.
Now that the rock has been removed from my ring, I reinserted it in the center of where I want to build a sand circle. Next step is creating an impression with this insert by pressing firmly on its surface and making a mark within it. This way, you can trace your circular path later when assembling these blocks into place
You should have something like: Now that all rocks are out of our area we will be inserting them back into one central location so let’s get started!
Installing the paver blocks

The paver fire pit kit came packaged in the photo above from Lowes. The box is rather heavy, so you’ll need a truck bed or small trailer to get it home safely. It was moved on its way with one of their forklifts!
To pick out the perfect paver blocks, look over them carefully. I found several that had small chips on their outer edges; this happens when they are being transported from place or another and is common for pavers like these to have imperfections in general.
So it was easy to find stones with defects lower down where no one will see them easily (and ultimately use those rocks instead of the higher-quality ones).
I knew the imperfections would be covered by the river rock on the bottom level. You may need to place the rocks on a side that you may not see or is not as visible.
I marked the outline as a guide for placing rocks. I used my hands to place them in alternating right and left positions around the circle, using it as a reference point. When all of them were set up tightly together with no gaps between blocks, they formed an enclosing wall that was difficult to escape from or enter by any potential predators at night .
As I began to fit the bottom layer of blocks, I realized that my dirt was on the soft side. If this is your situation, take a mallet and tap down any block which you feel may be higher than adjacent ones.
I used a 4 ft level to double check that I had made the bottom layer as flat and level as possible. Only two blocks needed adjusting, so this step was pretty fast.
Wanting to strengthen my tower, I staggered the second level of blocks. This technique also makes it stronger than lining all levels up with a single joint line – something I learned from doing this at school!
When I finished the second layer, I placed the fire insert over my pit to see how level everything was. Since there were minor variations in some of blocks on one end, it wasn’t touching with that part of my lower layers underneath which causes an uneven surface when put together.
To fix this issue and create a more balanced foundation for my fireplace set up, I added dirt onto the lower block base to even out its height against other blocks around edge.
Gluing the Blocks Together
Now, I was ready to use the construction glue that would connect the first and second layer of blocks. The process requires a caulking gun- if you don’t have experience with these before, take care not let any air bubbles make their way into your work.
When using a caulking gun, you might notice that there is an air bubble continuing to push out the material even after it you stop squeezing.
To avoid glue oozing out, release the caulk gun trigger every time you are done with a bead of adhesive. Once it passes through the tube air bubble will stop coming out and no more product comes up to your caulking job.
With a mallet in hand, I tapped each block on the second level to evenly distribute glue. Then with one block at a time removed from the third level and glued onto blocks of first layer , only when they were dry enough did this process continue until all blocks had been placed back into their designated positions.
Using the same process as before, I installed all of level three’s blocks at once and then removed them one by one to glue each layer.
Now you’re ready to place your metal fire insert over the top of your last layer of blocks. With the insert in place, I tapped all the blocks on the outside of this level to make sure they were installed tight against it.
After that was done, then I checked if any additional support might be needed by checking every block within sight for stability and giving them an extra tap here or there where necessary before moving onto gluing things up completely with a water-resistant construction adhesive like Liquid Nails.
Then I used some small brads (nail type fasteners) around its outer edges as well just so everything stayed together nice and snug until set. Finally once again gave each block one final light inspection from bottom through third levels including my
I didn’t move anything for 24 hours to let the glue set. We received some rain, but I checked if it was set by trying to pick up one of the blocks and they were immovable. Glue is key in keeping everything together rather than just laying them down loose.
Conclusion
By lining the bottom of your fire pit with fire bricks or installing lava rock, you can make sure that it lasts longer.
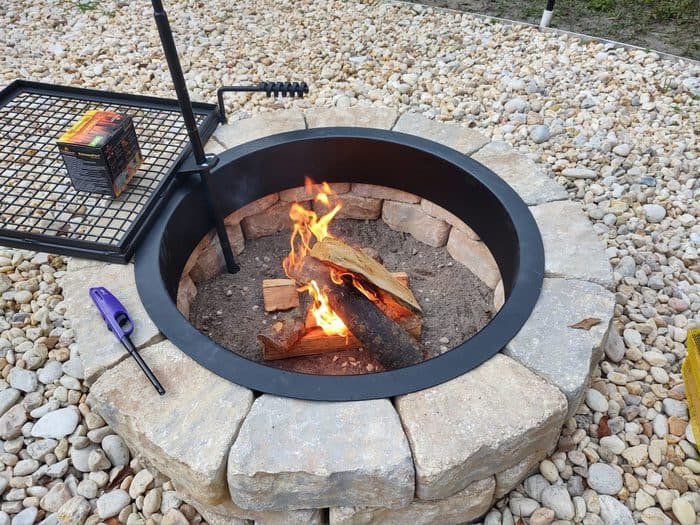
In all it took about an hour once I started placing the first block. My site prep took about another half hour which will be the biggest variance with installing your own fire pit kit. In the picture you can tell we added Titan adjustable swivel grill as we were about to roast some oysters over a nice, crackling fire!


Leave a Reply